
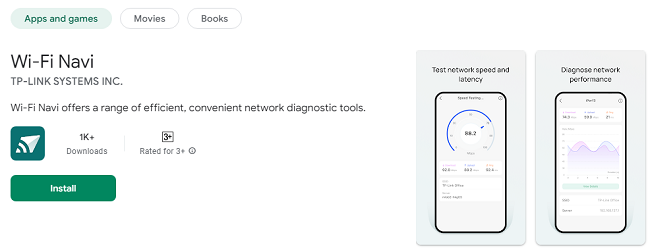
Download Wi-Fi Navi - Best App for Speed Tests & Network Optimization
In today’s digital age, having a reliable and high-performing Wi-Fi network is essential for everything from browsing the web to gaming, video calls, and streaming. A key part of ensuring your network runs smoothly is knowing how to diagnose and troubleshoot potential issues. This is where the Wi-Fi Navi app comes in—a powerful and user-friendly tool designed to optimize your network's performance.
Whether you're an Android or iOS user, Wi-Fi Navi provides easy-to-understand network diagnostics tools, speed tests, latency checks, and device management features. In this guide, we’ll walk you through the steps to download and use Wi-Fi Navi on your device, and show you how it can enhance your internet experience.
Why Wi-Fi Navi?
Before we dive into the download and usage steps, let’s quickly highlight why you should consider using Wi-Fi Navi:
Comprehensive Network Analysis: It offers a full suite of diagnostic tools, from speed tests to device discovery, latency checks, and signal strength analysis.
User-Friendly Interface: Even if you’re not tech-savvy, the app is simple to navigate, making troubleshooting easy for anyone.
Free of Charge: Wi-Fi Navi is completely free to download and use, without any hidden charges or subscriptions.
Device Compatibility: Wi-Fi Navi works seamlessly on both Android and iOS devices, providing consistent performance across platforms.
Now that you understand the benefits, let’s get started with downloading and using Wi-Fi Navi on your device!
How to Download & Install Wi-Fi Navi App on Android Devices?
Open Google Play Store
Unlock your Android device and go to the Google Play Store.
Tap the Google Play icon from your home screen or app drawer to open the store.
Search for Wi-Fi Navi
In the search bar at the top of the screen, type “Wi-Fi Navi.”
Press Enter or tap on the search icon to start the search.
Select the Correct App
From the search results, look for the app titled “Wi-Fi Navi: Network Diagnostics & Speed Test.”
Ensure you are selecting the official app by checking the developer’s name, which should be listed as Wi-Fi Navi (make sure it’s from a trusted source).
Tap Install
Once you’ve found the correct app, tap the green Install button to begin the download process.
Wi-Fi Navi is a lightweight app, so it should download quickly.
Wait for Installation to Complete
After the app finishes downloading, it will automatically install on your Android device. The installation process typically takes only a few moments.
Open the App
Once installed, tap on the Open button from the Play Store, or find the app’s icon on your home screen or app drawer and tap to launch it.
How to Download & Install Wi-Fi Navi App on iOS Devices?
Open the App Store
Unlock your iPhone or iPad and open the App Store.
Tap on the App Store icon from your home screen.
Search for Wi-Fi Navi
In the search tab at the bottom of the screen, type “Wi-Fi Navi” into the search bar.
Tap Search on the keyboard to view the results.
Choose the Official Wi-Fi Navi App
From the search results, find the app titled “Wi-Fi Navi: Network Diagnostics & Speed Test.”
Check that the app is from the developer Wi-Fi Navi to ensure you're downloading the correct one.
Tap Get to Install
Tap the Get button next to the app, followed by Install (you may need to confirm with your Apple ID, Face ID, or Touch ID).
The download will begin immediately.
Wait for the App to Download
Wi-Fi Navi will download and install automatically. This process should only take a few moments depending on your internet connection speed.
Launch the App
Once installed, tap Open to start using Wi-Fi Navi, or find its icon on your home screen and tap it to open the app.
How to Use Wi-Fi Navi: A Step-by-Step Guide
Now that you have Wi-Fi Navi installed on your Android or iOS device, let’s explore how to use its key features to optimize your Wi-Fi network.
1. Run a Speed Test
One of the most commonly used features in Wi-Fi Navi is the speed test, which measures the download speed, upload speed, and latency (ping) of your internet connection.
Step 1: Open the Wi-Fi Navi app.
Step 2: On the main screen, tap the Speed Test button.
Step 3: The app will automatically start testing your connection by sending data to a remote server.
Step 4: Once the test is complete, Wi-Fi Navi will display your results, including:
Download Speed (how fast data is received from the internet)
Upload Speed (how fast data is sent from your device)
Ping/Latency (the response time from your device to the server)
Use this feature to ensure your internet connection is performing as expected and to troubleshoot any slow speeds.
2. Diagnose Network Latency
Latency can impact everything from video calls to gaming. To measure how fast your network responds, you can perform a ping test using Wi-Fi Navi.
Step 1: In the app, navigate to the Ping Test section.
Step 2: Enter the URL of the server or service you want to ping (for example, Google's DNS server: 8.8.8.8).
Step 3: Tap Start to begin the ping test.
Step 4: The app will display the round-trip time (in milliseconds) it took for a data packet to travel from your device to the server and back. Lower ping values are ideal for smooth online experiences.
3. Analyze Wi-Fi Signal Strength
Wi-Fi Navi allows you to visualize the strength of your Wi-Fi signal across different areas of your home or office.
Step 1: Tap on the Signal Strength button.
Step 2: Walk around your space, and the app will continuously monitor your Wi-Fi signal strength.
Step 3: The app displays a color-coded map showing the signal strength at various locations. Red means weak signal, while green indicates a strong connection.
This feature is perfect for optimizing router placement to improve coverage in areas with weak signals.
4. Discover Devices on Your Network
Wi-Fi Navi can also help you scan your network to see which devices are connected to it. This is useful for detecting unauthorized devices or managing your network load.
Step 1: Tap on the Device Discovery feature in the app.
Step 2: The app will scan your network and display all connected devices, showing their IP addresses, MAC addresses, and device names.
Step 3: Use this information to identify devices consuming too much bandwidth or unauthorized devices that may pose a security risk.
5. Use Trace Route for Advanced Diagnostics
If you're experiencing slow speeds or connectivity issues with specific services, Wi-Fi Navi's Trace Route feature allows you to see the path your data takes through the network.
Step 1: Open the Trace Route section in the app.
Step 2: Enter the URL of the website or service you want to trace.
Step 3: The app will map out each hop your data makes, showing the time taken for each stage of the route.
Step 4: Analyze the results to identify potential slowdowns or failures in your network path.
Tips for Using Wi-Fi Navi Effectively
Run Regular Speed Tests: It’s a good idea to perform speed tests at different times of the day to monitor fluctuations in performance and spot any recurring issues.
Optimize Router Placement: Use the signal strength map to find areas with weak Wi-Fi and move your router to a more central location for better coverage.
Monitor Network Usage: Regularly check the device list to ensure only authorized devices are connected, and look for any heavy bandwidth users that could be affecting your network performance.
Use Ping Tests for Gaming & Streaming: If you’re an avid gamer or often stream content, use the ping test to make sure latency is low and your connection is responsive.
Conclusion: Enhancing Your Network with Wi-Fi Navi
Wi-Fi Navi is a powerful tool that offers a range of features to help you diagnose, troubleshoot, and optimize your Wi-Fi network. Whether you're troubleshooting slow speeds, managing connected devices, or checking network security, the app provides an easy and effective solution.
By following the simple steps outlined above, you can download and start using Wi-Fi Navi on your Android or iOS device in no time. With regular use, Wi-Fi Navi can help ensure that your network stays fast, secure, and reliable.
Updates